

manage.py, your project’s WSGI entry at <project>/wsgi.py, and a requirements.txt (or pyproject.toml) listing django, gunicorn, and a Postgres driver (psycopg or psycopg2). The guide adds dj-database-url so settings.py can parse DATABASE_URL, and whitenoise so the app can serve static files without a separate nginx; both are optional if you already handle those pieces differently.
settings.py should read SECRET_KEY, DATABASE_URL, ALLOWED_HOSTS, and DEBUG from environment variables so the same code runs locally and on Suga. WhiteNoise middleware belongs right after SecurityMiddleware, and STATIC_ROOT should be set.
collectstatic imports settings.py during the build. Read them with fallbacks so the import still works: os.environ.get("SECRET_KEY", "insecure-build-key") and dj_database_url.config(default="sqlite://:memory:").Deploy using the Canvas
Create a project from your repo
Add Postgres from a template
POSTGRES_USER and POSTGRES_DB (both default to postgres) and pre-fills a generated POSTGRES_PASSWORD./var/lib/postgresql/data.Expose the app on HTTPS
8000. Then, in the Public Network section, click Add Endpoint → HTTPS Domain and choose port 8000.Wire the app's environment variables
DATABASE_URL env var. Set the value to a connection string with an embedded reference to Postgres’s password:{{...}} picker inserts the reference alongside literal text, so the app reads the password from postgres at deploy time without duplicating it. Swap the user and database name if you changed them from the defaults.Then add ALLOWED_HOSTS: choose Reference, and pick the app container → SUGA_PUBLIC_HOSTNAME. Django reads it at boot to accept requests from your public URL.Last, add DEBUG set to False. A fresh settings.py defaults to True, which serves tracebacks and settings to anyone who hits the public URL.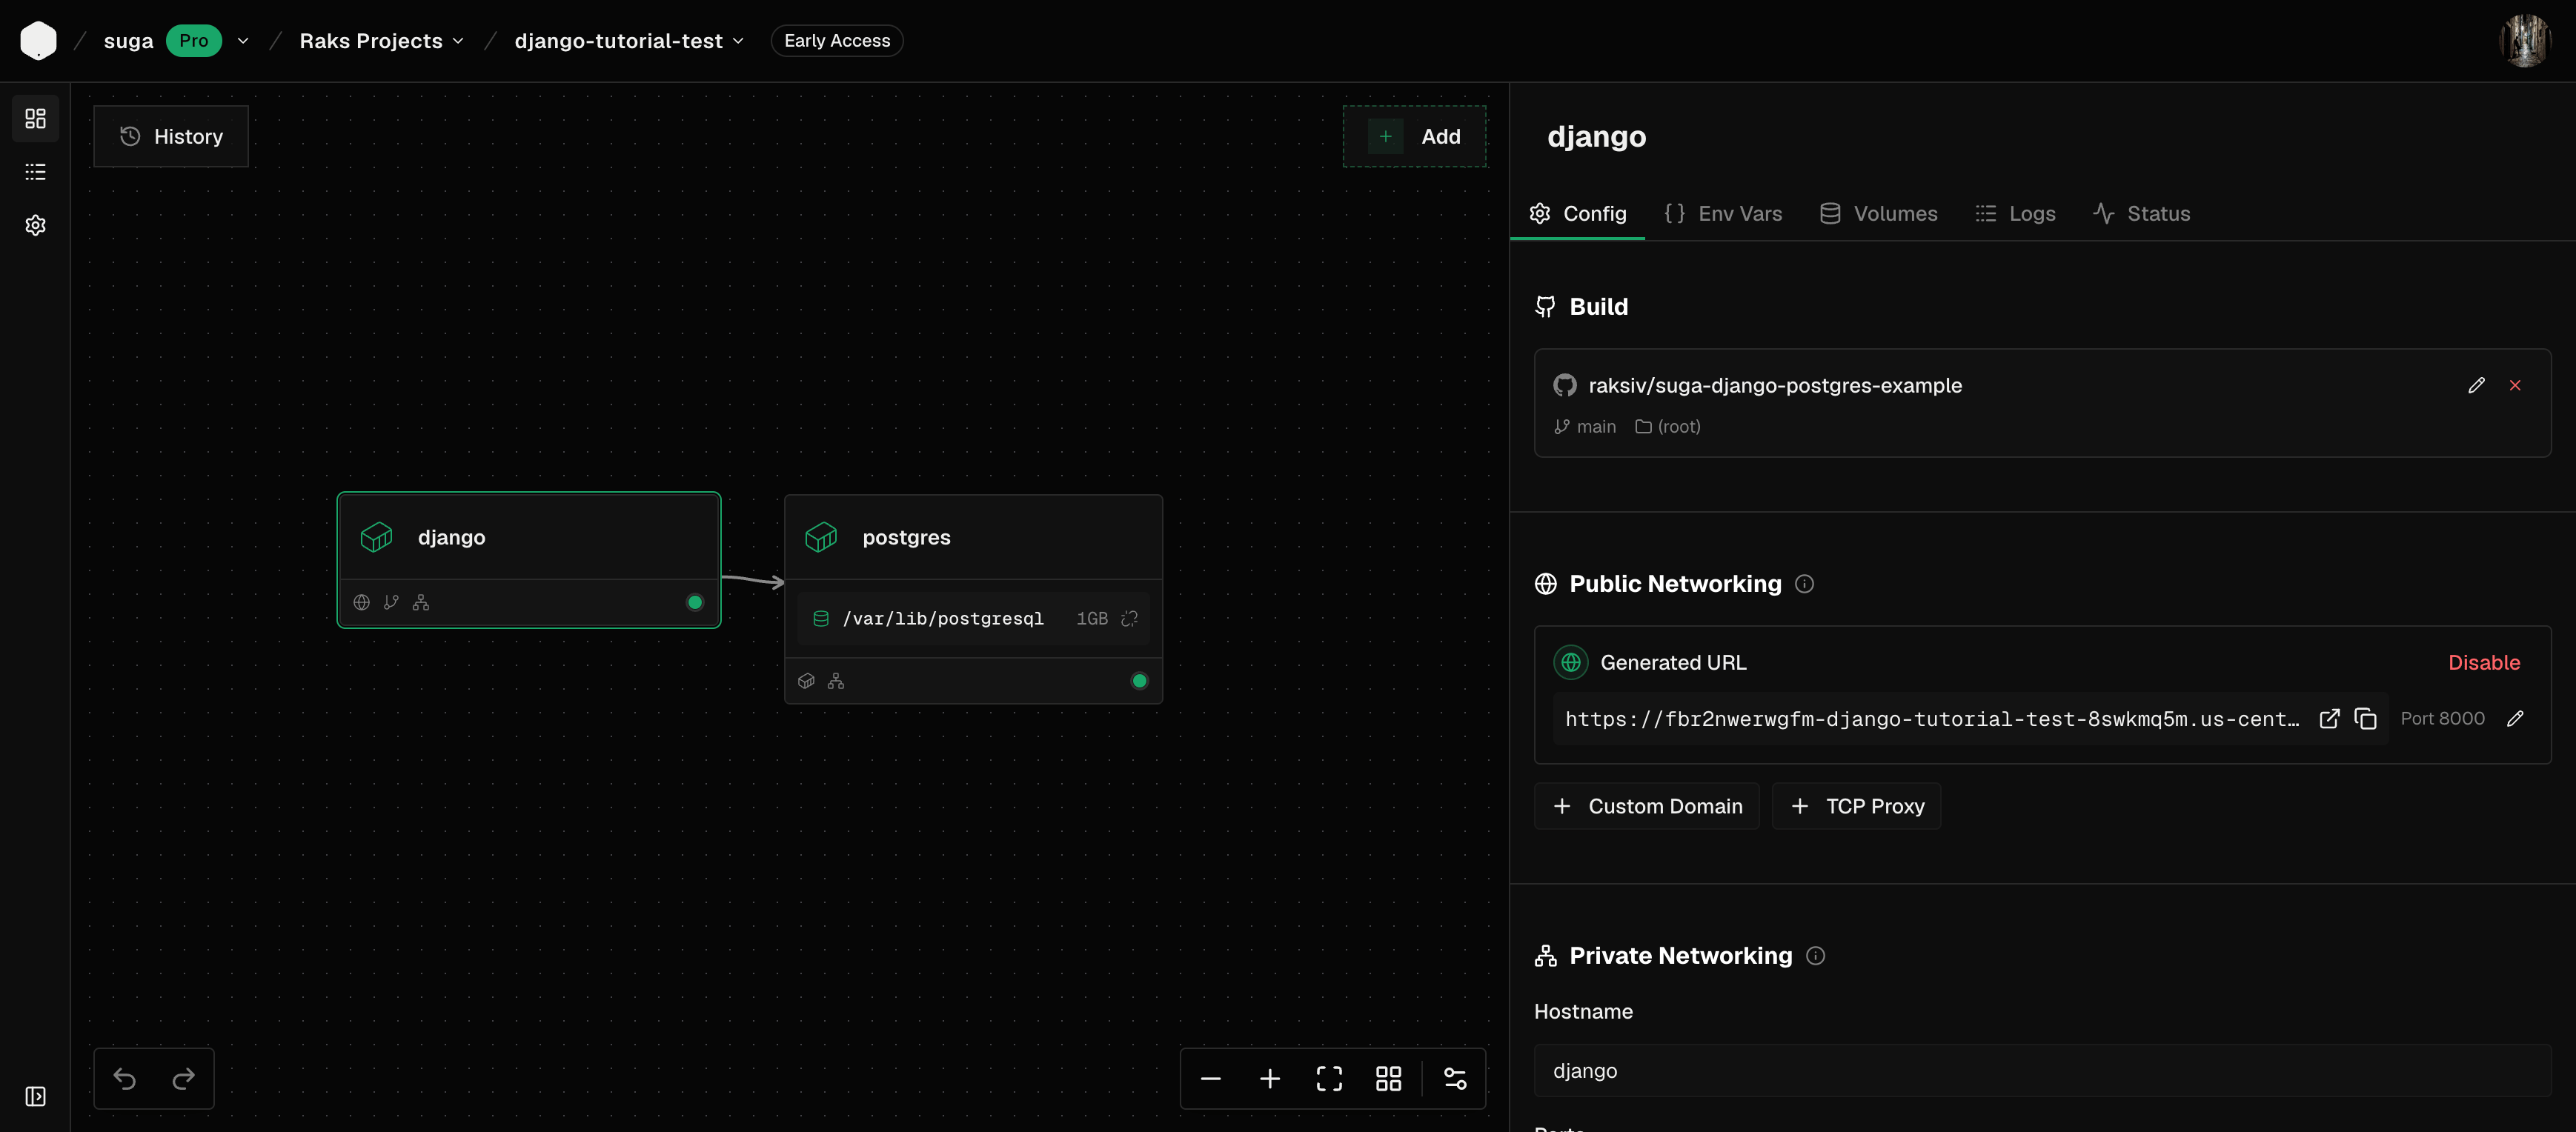
Configure build args and apply
RAILPACK_BUILD_CMD:python manage.py collectstatic --noinput, which bakes WhiteNoise’s static files into the image at build time.RAILPACK_START_CMD:python manage.py migrate && gunicorn <project>.wsgi:application --bind 0.0.0.0:8000, swapping<project>for the folder next tomanage.pythat holdswsgi.py. Runs pending migrations before Gunicorn boots.
SECRET_KEY as a Sensitive env var on the app container (generate one with python -c "from django.core.management.utils import get_random_secret_key; print(get_random_secret_key())"), and click Apply in the top right.Suga clones the app repo, installs dependencies, collects static files during the build, applies migrations at boot, starts Gunicorn on port 8000, and rolls out both containers. The Django app is served at the public URL and reaches Postgres privately at postgres:5432. Open /admin and you’ll get the Django admin login with its stylesheets in place, which confirms both the deploy and the static files.Deploy using an Agent
To deploy with a coding agent such as Claude Code, Codex, or OpenCode, follow these steps:Connect the Suga MCP
Ask your agent to deploy
Set the sensitive values
POSTGRES_PASSWORD on the postgres container: click the value input and paste a value generated with openssl rand -hex 32. On the app container, add SECRET_KEY as a Sensitive env var (generate one with python -c "from django.core.management.utils import get_random_secret_key; print(get_random_secret_key())").Apply to deploy
postgres:5432. Open /admin and you’ll get the Django admin login with its stylesheets in place, which confirms both the deploy and the static files.FAQ
Do I need a Dockerfile to deploy Django on Suga?
Do I need a Dockerfile to deploy Django on Suga?
requirements.txt or pyproject.toml and runs the standard install and start flow. If you already have a Dockerfile, you can tell the agent to use it instead; otherwise auto-detect handles the common case.Which Python versions does Suga support?
Which Python versions does Suga support?
.python-version, runtime.txt, .tool-versions, or mise.toml.What if my app needs a different start command?
What if my app needs a different start command?
RAILPACK_START_CMD as a build arg on the app container with your exact command. Common alternatives: gunicorn <project>.wsgi:application --bind 0.0.0.0:8000 for a custom project name, daphne -b 0.0.0.0 -p 8000 <project>.asgi:application for ASGI or Channels, uwsgi --http :8000 --module <project>.wsgi:application for uWSGI, or hypercorn <project>.asgi:application --bind 0.0.0.0:8000 for Hypercorn. Suga only cares that something listens on the container’s private port.What if my settings.py doesn't use dj-database-url?
What if my settings.py doesn't use dj-database-url?
django-environ, it parses DATABASE_URL the same way, so keep the guide’s env var and drop dj-database-url from requirements.txt. If your settings.py reads individual DB_HOST, DB_PORT, DB_USER, DB_PASSWORD, and DB_NAME variables instead, skip DATABASE_URL on the app container and set those variables directly, referencing the postgres container’s POSTGRES_PASSWORD for the password. The reference works for any variable name.How do I run migrations before the app starts?
How do I run migrations before the app starts?
RAILPACK_START_CMD=python manage.py migrate && gunicorn <project>.wsgi:application --bind 0.0.0.0:8000 as a build arg. Migrations run each time a new container boots and no-op if there’s nothing to apply.Can I skip auto-migrations at boot?
Can I skip auto-migrations at boot?
python manage.py migrate && prefix from RAILPACK_START_CMD and run migrations manually — from the container’s shell in the dashboard, or from your CI pipeline before you Apply. Running migrations at boot is convenient, but teams with strict migration workflows often prefer to trigger them explicitly.How do I serve static files?
How do I serve static files?
RAILPACK_BUILD_CMD=python manage.py collectstatic --noinput as a build arg on the app container. In settings.py, add WhiteNoise middleware to MIDDLEWARE (right after SecurityMiddleware) and set STATIC_ROOT. WhiteNoise then serves the baked static files without a separate nginx.What if I serve static files from S3 or a CDN?
What if I serve static files from S3 or a CDN?
STATICFILES_STORAGE at django-storages’ S3 backend (or your CDN’s storage backend) in settings.py, and add AWS credentials as Sensitive env vars on the app container. Those only reach the running container, so collectstatic can’t upload during the build: drop RAILPACK_BUILD_CMD and run collectstatic from CI before you Apply.Do I need collectstatic if my app has no custom static assets?
Do I need collectstatic if my app has no custom static assets?
CompressedManifestStaticFilesStorage refuses to serve any static asset unless the manifest was built. If your project is a pure JSON API with the admin disabled, drop RAILPACK_BUILD_CMD from the build args and remove WhiteNoise from MIDDLEWARE.Why does my build fail on collectstatic with a missing SECRET_KEY or DATABASE_URL?
Why does my build fail on collectstatic with a missing SECRET_KEY or DATABASE_URL?
settings.py can’t read them during the build. Give every setting read at import time a fallback, for example os.environ.get("SECRET_KEY", "insecure-build-key") instead of os.environ["SECRET_KEY"]. The real values arrive as env vars at boot.Can I use a database other than Postgres?
Can I use a database other than Postgres?
postgres:18-alpine container for a MySQL, MariaDB, or MongoDB image (or any container that runs the database you want). Update Django’s DATABASES setting and the driver in your requirements.txt to match.How do I run Celery or a background worker?
How do I run Celery or a background worker?
RAILPACK_START_CMD=celery -A <project> worker --loglevel=info. Set the same DATABASE_URL and any broker env vars, and leave it with no public endpoint. Add a Redis container from the template if Celery needs a broker.What about Postgres backups?
What about Postgres backups?
pg_dump on a schedule from another container, or point the app at a managed Postgres service instead of a container.Can I use a custom domain?
Can I use a custom domain?
ALLOWED_HOSTS too.What does deploying Django plus Postgres cost on Suga?
What does deploying Django plus Postgres cost on Suga?