

main.py exposing app = FastAPI(...)) and a requirements.txt listing fastapi, an ASGI server (uvicorn), and a Postgres driver (psycopg or psycopg2), plus any ORM or migration tooling you use.
Deploy using the Canvas
1
Create a project from your repo
In the Suga dashboard, click New project and pick your FastAPI repo from the GitHub list, installing the Suga GitHub App if prompted. On the import page, name the project, set the branch you want deployed, and leave the build method on auto-detect; Suga detects the Python install and start commands. See Import from a GitHub repository for the full set of import options.Click Create project. Suga opens the canvas with the app service already connected to your repo.
2
Add Postgres from a template
Right-click empty space on the canvas, choose Add → Template, and pick PostgreSQL. Suga prompts for Suga adds the postgres container with port 5432 private and a volume mounted at
POSTGRES_USER and POSTGRES_DB (both default to postgres) and pre-fills a generated POSTGRES_PASSWORD.Copy the password now, it won’t be visible after creation.
/var/lib/postgresql/data.3
Expose the app on HTTPS
Select the app service. On its Config tab, in the Private Network section, set the port to
8000. Then, in the Public Network section, click Add Endpoint → HTTPS Domain and choose port 8000.4
Wire DATABASE_URL
On the app container, add a The 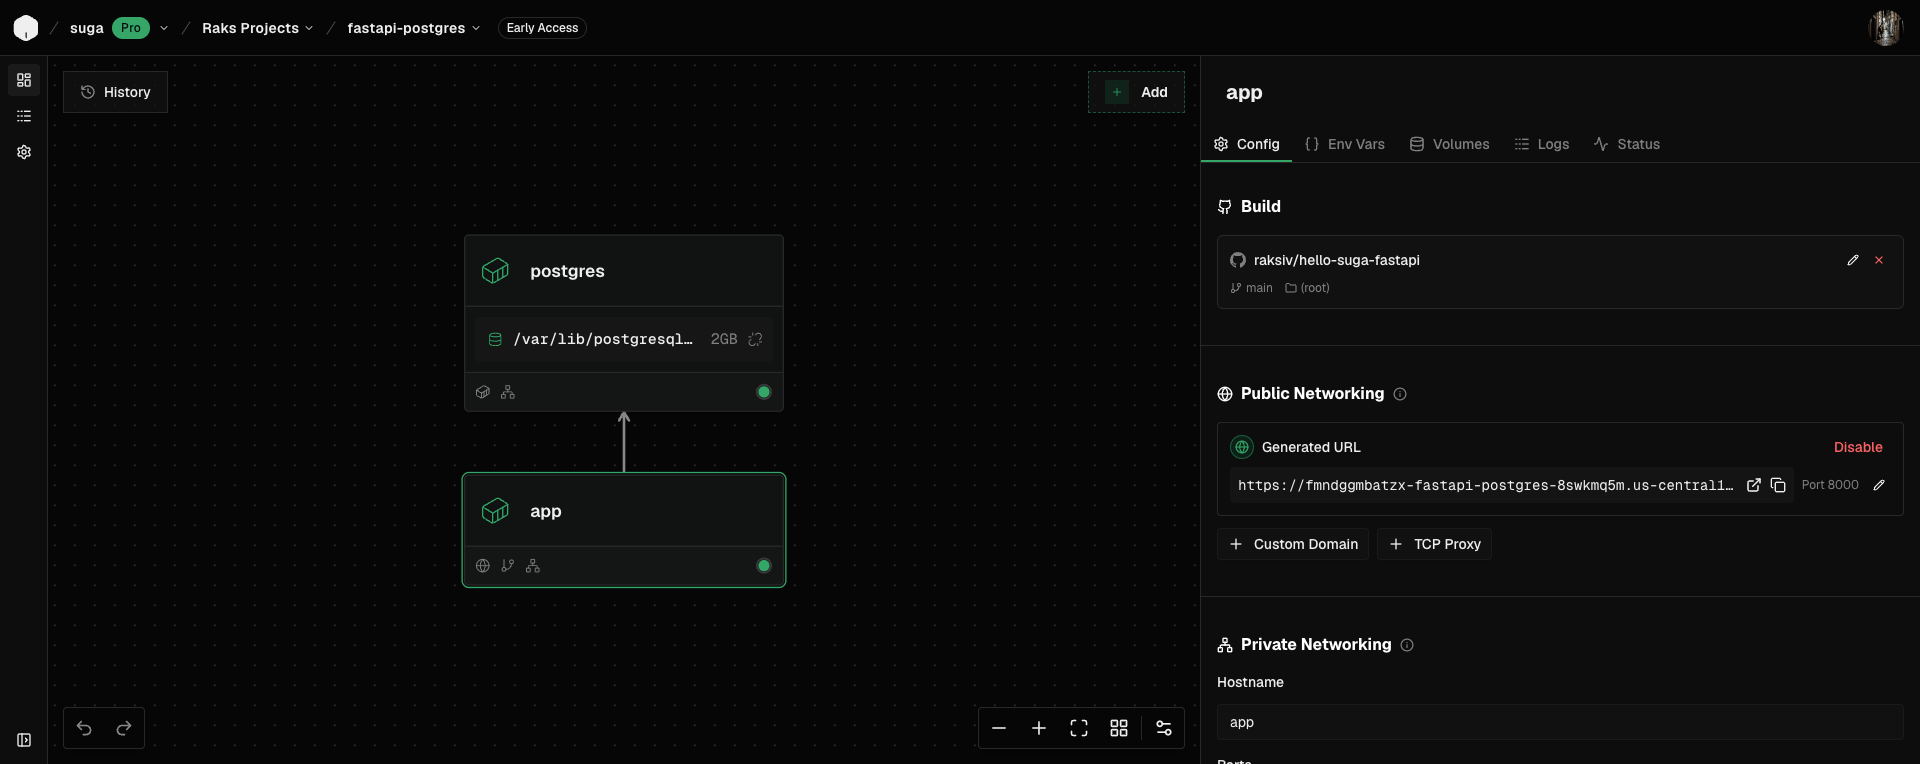
DATABASE_URL env var. Set the value to a connection string with an embedded reference to Postgres’s password:{{...}} picker inserts the reference alongside literal text, so the app reads the password from postgres at deploy time without duplicating it. Swap the user and database name if you changed them from the defaults.5
Apply to deploy
Add any other secrets your app needs (JWT signing keys, API keys) as Sensitive env vars on the app container, then click Apply in the top right.Suga clones the app repo, installs dependencies, starts the ASGI server on port 8000, and rolls out both containers. The FastAPI app is served at the public URL and reaches Postgres privately at
postgres:5432. Hit the root URL and you’ll see:Deploy using an Agent
To deploy with a coding agent such as Claude Code, Codex, or OpenCode, follow these steps:1
Connect the Suga MCP
If you haven’t already, connect your agent to the Suga MCP server.
2
Ask your agent to deploy
Ask your agent to deploy your repo to Suga. Here’s a basic prompt you can use, with your repo and branch filled in:The agent will give you a link to the new environment on the Suga canvas. Open it to review the setup.
Prompt
3
Set the sensitive values
Set
POSTGRES_PASSWORD on the postgres container: click the value input and paste a value generated with openssl rand -hex 32. If your app has other secrets (JWT signing keys, API keys), add them to the app container as Sensitive env vars.Save the postgres password somewhere secure, you’ll want it later.
4
Apply to deploy
Click Apply in the top right. Suga clones the app repo, installs dependencies, starts the ASGI server on port 8000, and rolls out both containers. The FastAPI app is served at the public URL and reaches Postgres privately at
postgres:5432. Hit the root URL and you’ll see:FAQ
Do I need a Dockerfile to deploy FastAPI on Suga?
Do I need a Dockerfile to deploy FastAPI on Suga?
No. Suga detects Python from
requirements.txt or pyproject.toml and runs the standard install and start flow. If you already have a Dockerfile, you can tell the agent to use it instead; otherwise Suga’s auto-detect handles the common case.Which Python versions does Suga support?
Which Python versions does Suga support?
Any version. Suga uses the version pinned in
.python-version, runtime.txt, or your pyproject.toml if present, and falls back to a recent LTS release.What if my app's start command isn't uvicorn main:app?
What if my app's start command isn't uvicorn main:app?
Pass
RAILPACK_START_CMD as a build arg on the app container with your exact command, for example uvicorn app.main:app --host 0.0.0.0 --port 8000 or gunicorn -k uvicorn.workers.UvicornWorker app.main:app. The default only works when your entry point matches the standard main:app pattern.How do I run Alembic migrations before the app starts?
How do I run Alembic migrations before the app starts?
Wrap the start command with the migration: pass
RAILPACK_START_CMD=alembic upgrade head && uvicorn main:app --host 0.0.0.0 --port 8000 as a build arg. The migration runs each time a new container boots.Can I use a database other than Postgres?
Can I use a database other than Postgres?
Yes. Swap the
postgres:18-alpine container for a MySQL, MariaDB, or MongoDB image (or any container that runs the database you want). Adjust DATABASE_URL and the driver in your requirements.txt to match.How do I do connection pooling?
How do I do connection pooling?
Configure pool size in SQLAlchemy or your driver directly. For a shared external pool, add PgBouncer as a third container on the canvas and point
DATABASE_URL at it instead of postgres directly.What about Postgres backups?
What about Postgres backups?
The managed volume persists across restarts, redeploys, and rollbacks. For point-in-time recovery or off-site backups, run
pg_dump on a schedule from another container, or point the app at a managed Postgres service instead of a container.What does deploying FastAPI plus Postgres cost on Suga?
What does deploying FastAPI plus Postgres cost on Suga?
The Free tier fits a small FastAPI plus Postgres stack, including the build history and volume. Pro is per-seat with hosting credits that offset compute and storage. Full pricing at suga.app/pricing.