

docker-compose.yml
Deploy using the Canvas
1
Create a project
In the Suga dashboard, click New project, then Create empty project. Suga creates the project along with a default
production environment; the canvas opens automatically.2
Import the Compose file
Right-click empty space on the canvas and choose Add → Import Compose. Paste your
compose file. Suga adds a container for each service, wired with the images,
env vars, ports, and named volumes from the file. For the example file,
that’s two containers: postgres and n8n.
3
Expose your app on HTTPS
Select the container that needs a public URL. On its Config tab, in the
Public Network section, click Add Endpoint → HTTPS Domain and choose
the service’s port. Suga reserves a hostname immediately and shows the URL in
the properties panel. For the example, add the endpoint to the n8n container
on port 5678.
4
Wire the env var references
Import resolves 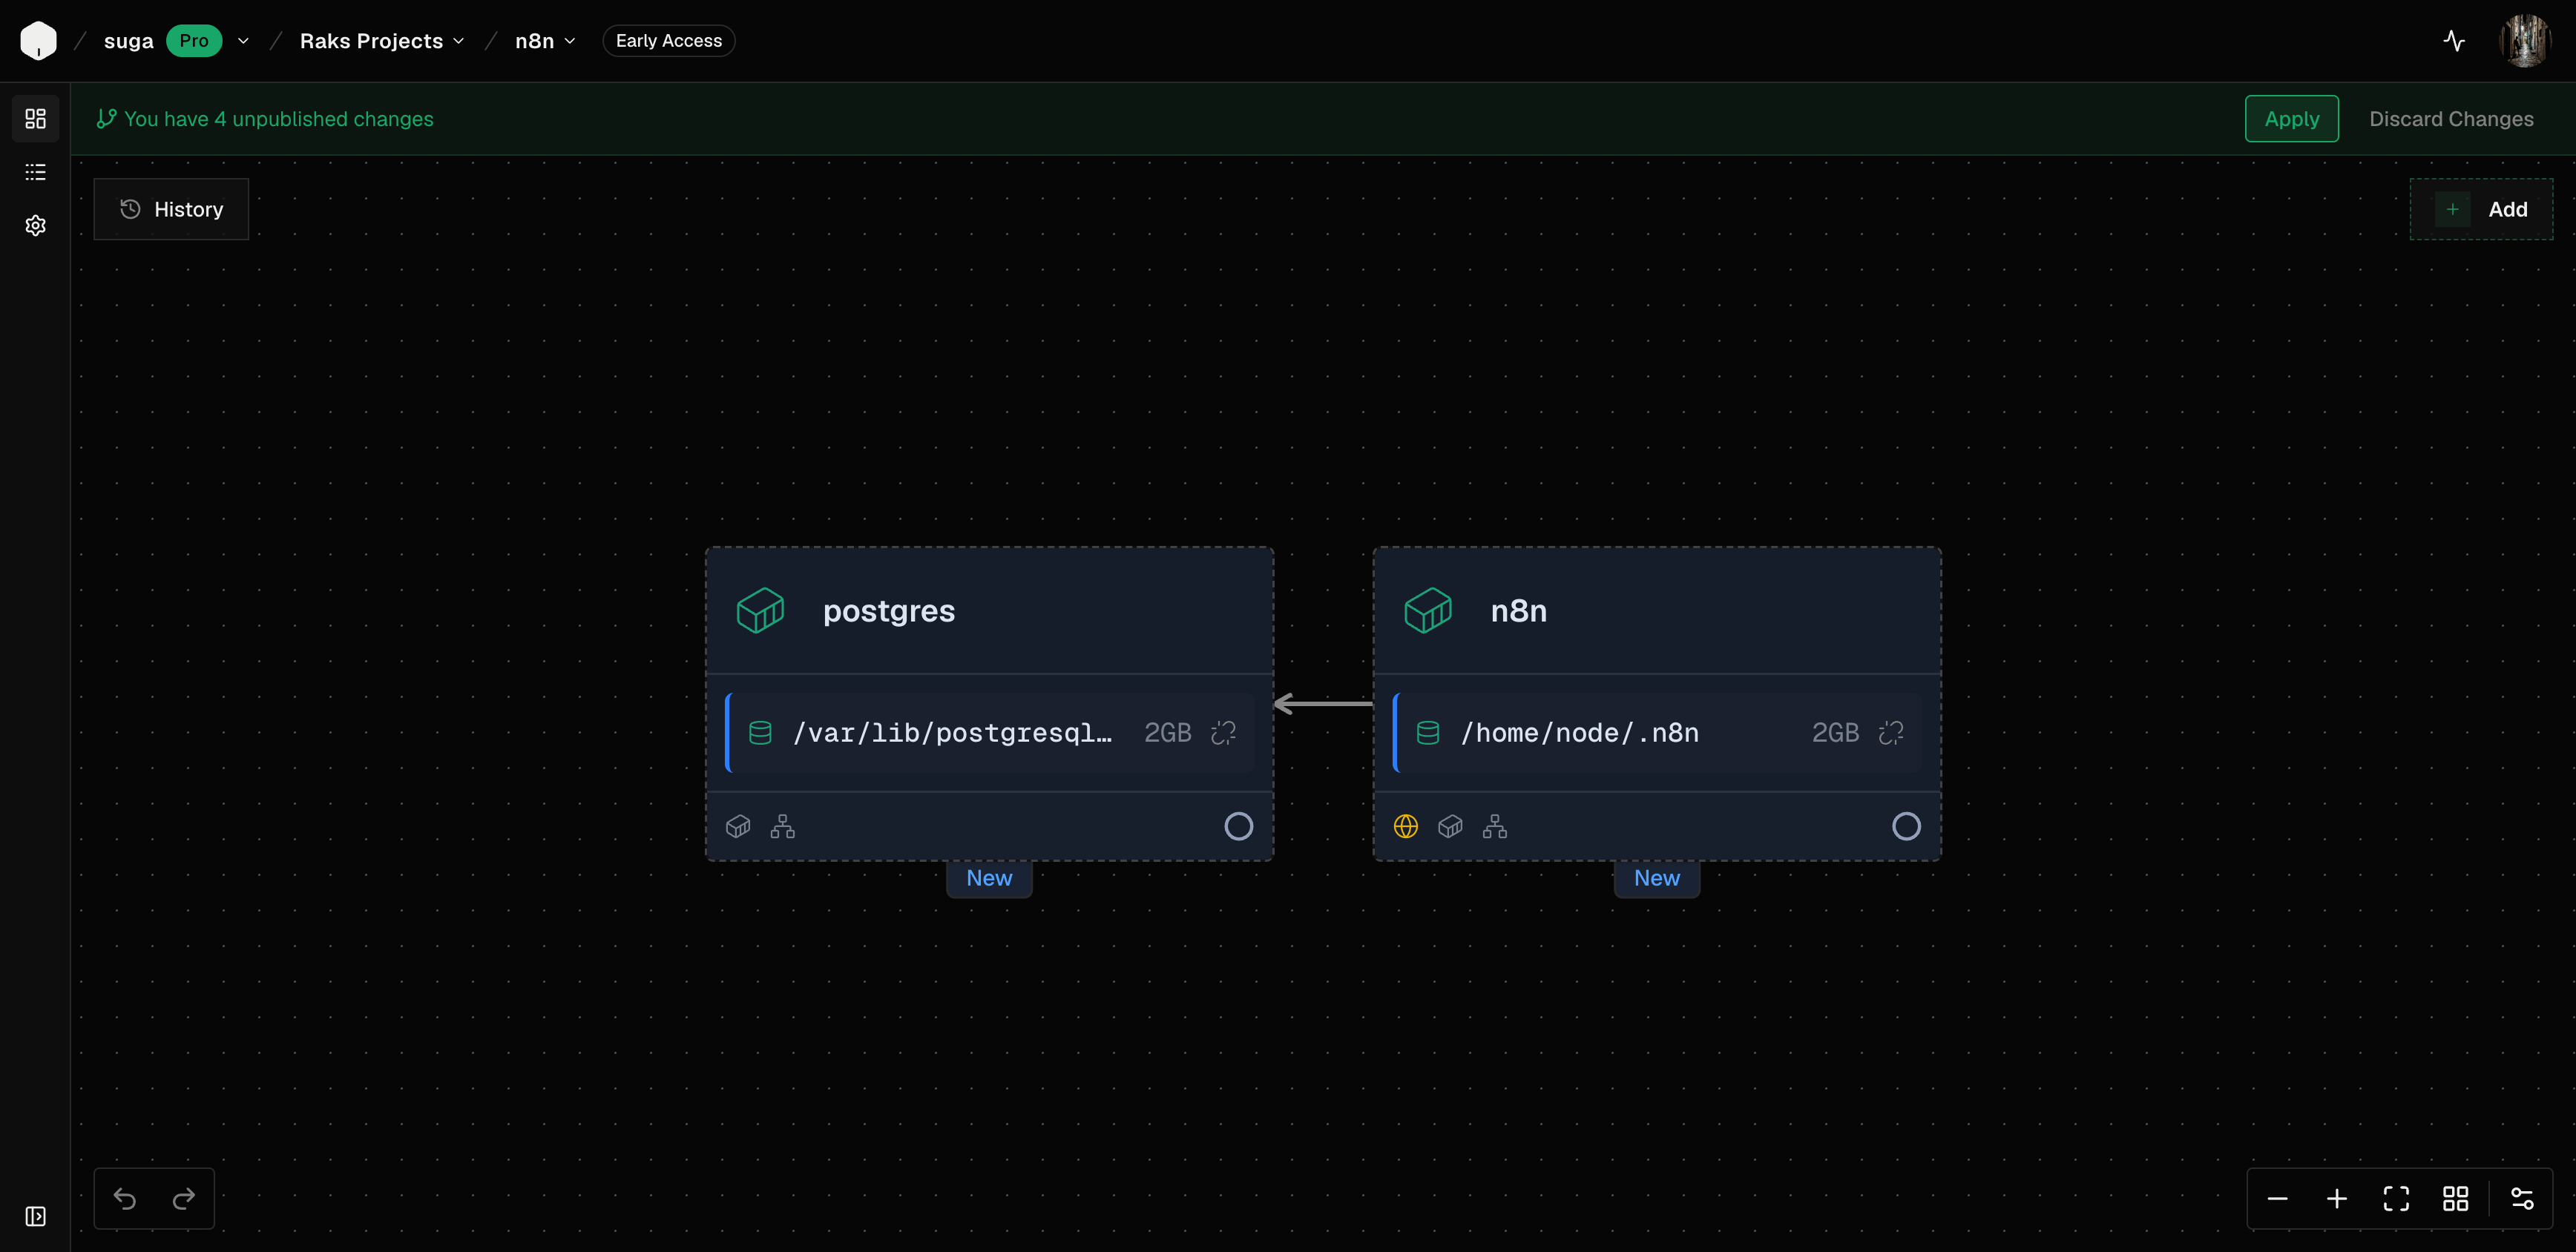
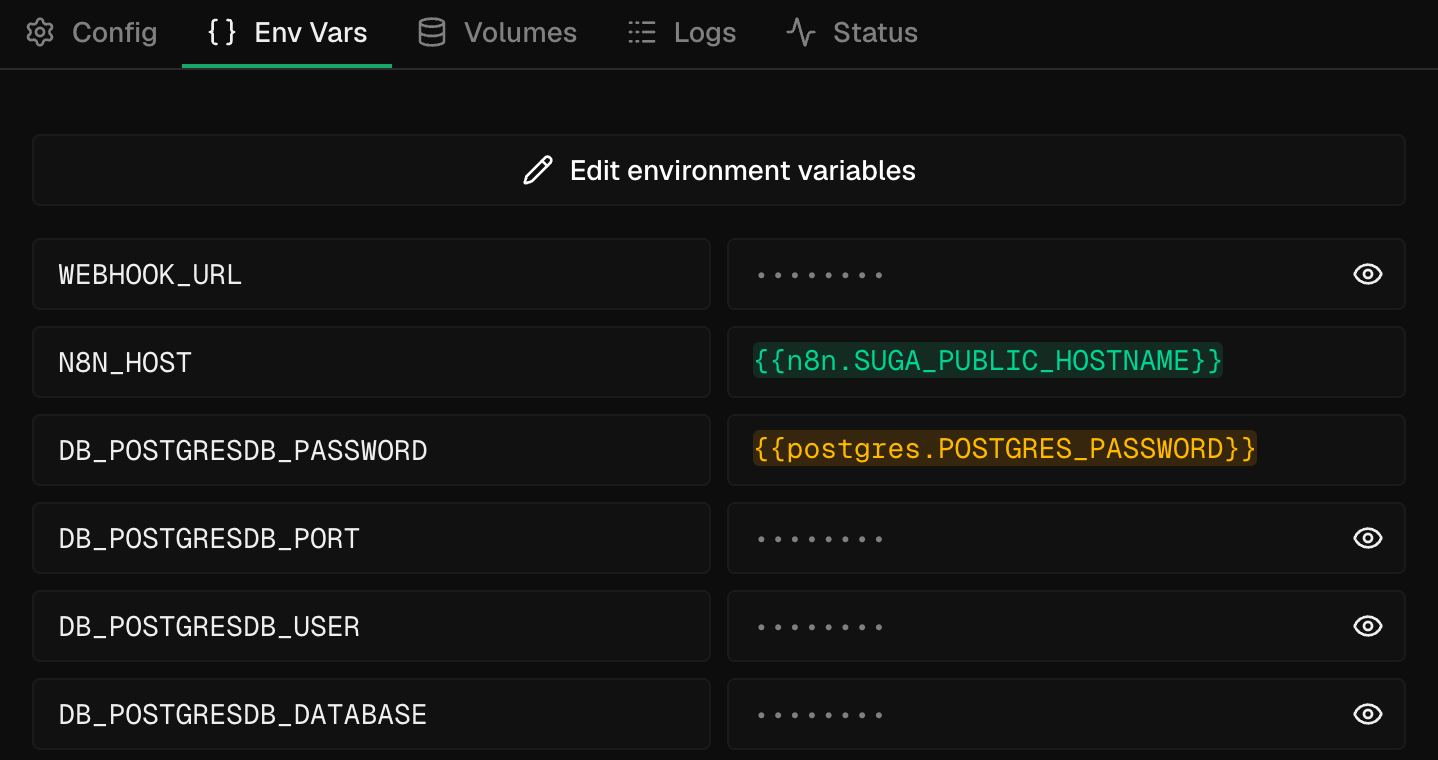
${VAR} shell placeholders for you: variables shared between services (like a database password) arrive as cross-container references, and ${VAR:-default} defaults are applied. What’s left is swapping any localhost-style defaults for your Suga hostname.For the example file, update the n8n container’s env vars:N8N_HOST: choose Reference, pickn8n→SUGA_PUBLIC_HOSTNAME.WEBHOOK_URL: set tohttps://{{n8n.SUGA_PUBLIC_HOSTNAME}}/. The{{...}}picker inserts the reference alongside literal text.N8N_PROTOCOL: set to the literalhttps.
5
Set the sensitive values
Import marks secret-looking env vars (passwords, keys, tokens) as Sensitive, but they still need real values. Click each value cell and provide one. The example file has two, which you can generate with
openssl rand -hex 32:POSTGRES_PASSWORDon the postgres container.N8N_ENCRYPTION_KEYon the n8n container. n8n uses this to encrypt credentials it stores in the database.
Save both values somewhere secure, you’ll want them later.
6
Apply to deploy
Click Apply in the top right of the canvas. Suga rolls your containers out. For the example app, n8n’s first-run screen loads at the public URL a few seconds later.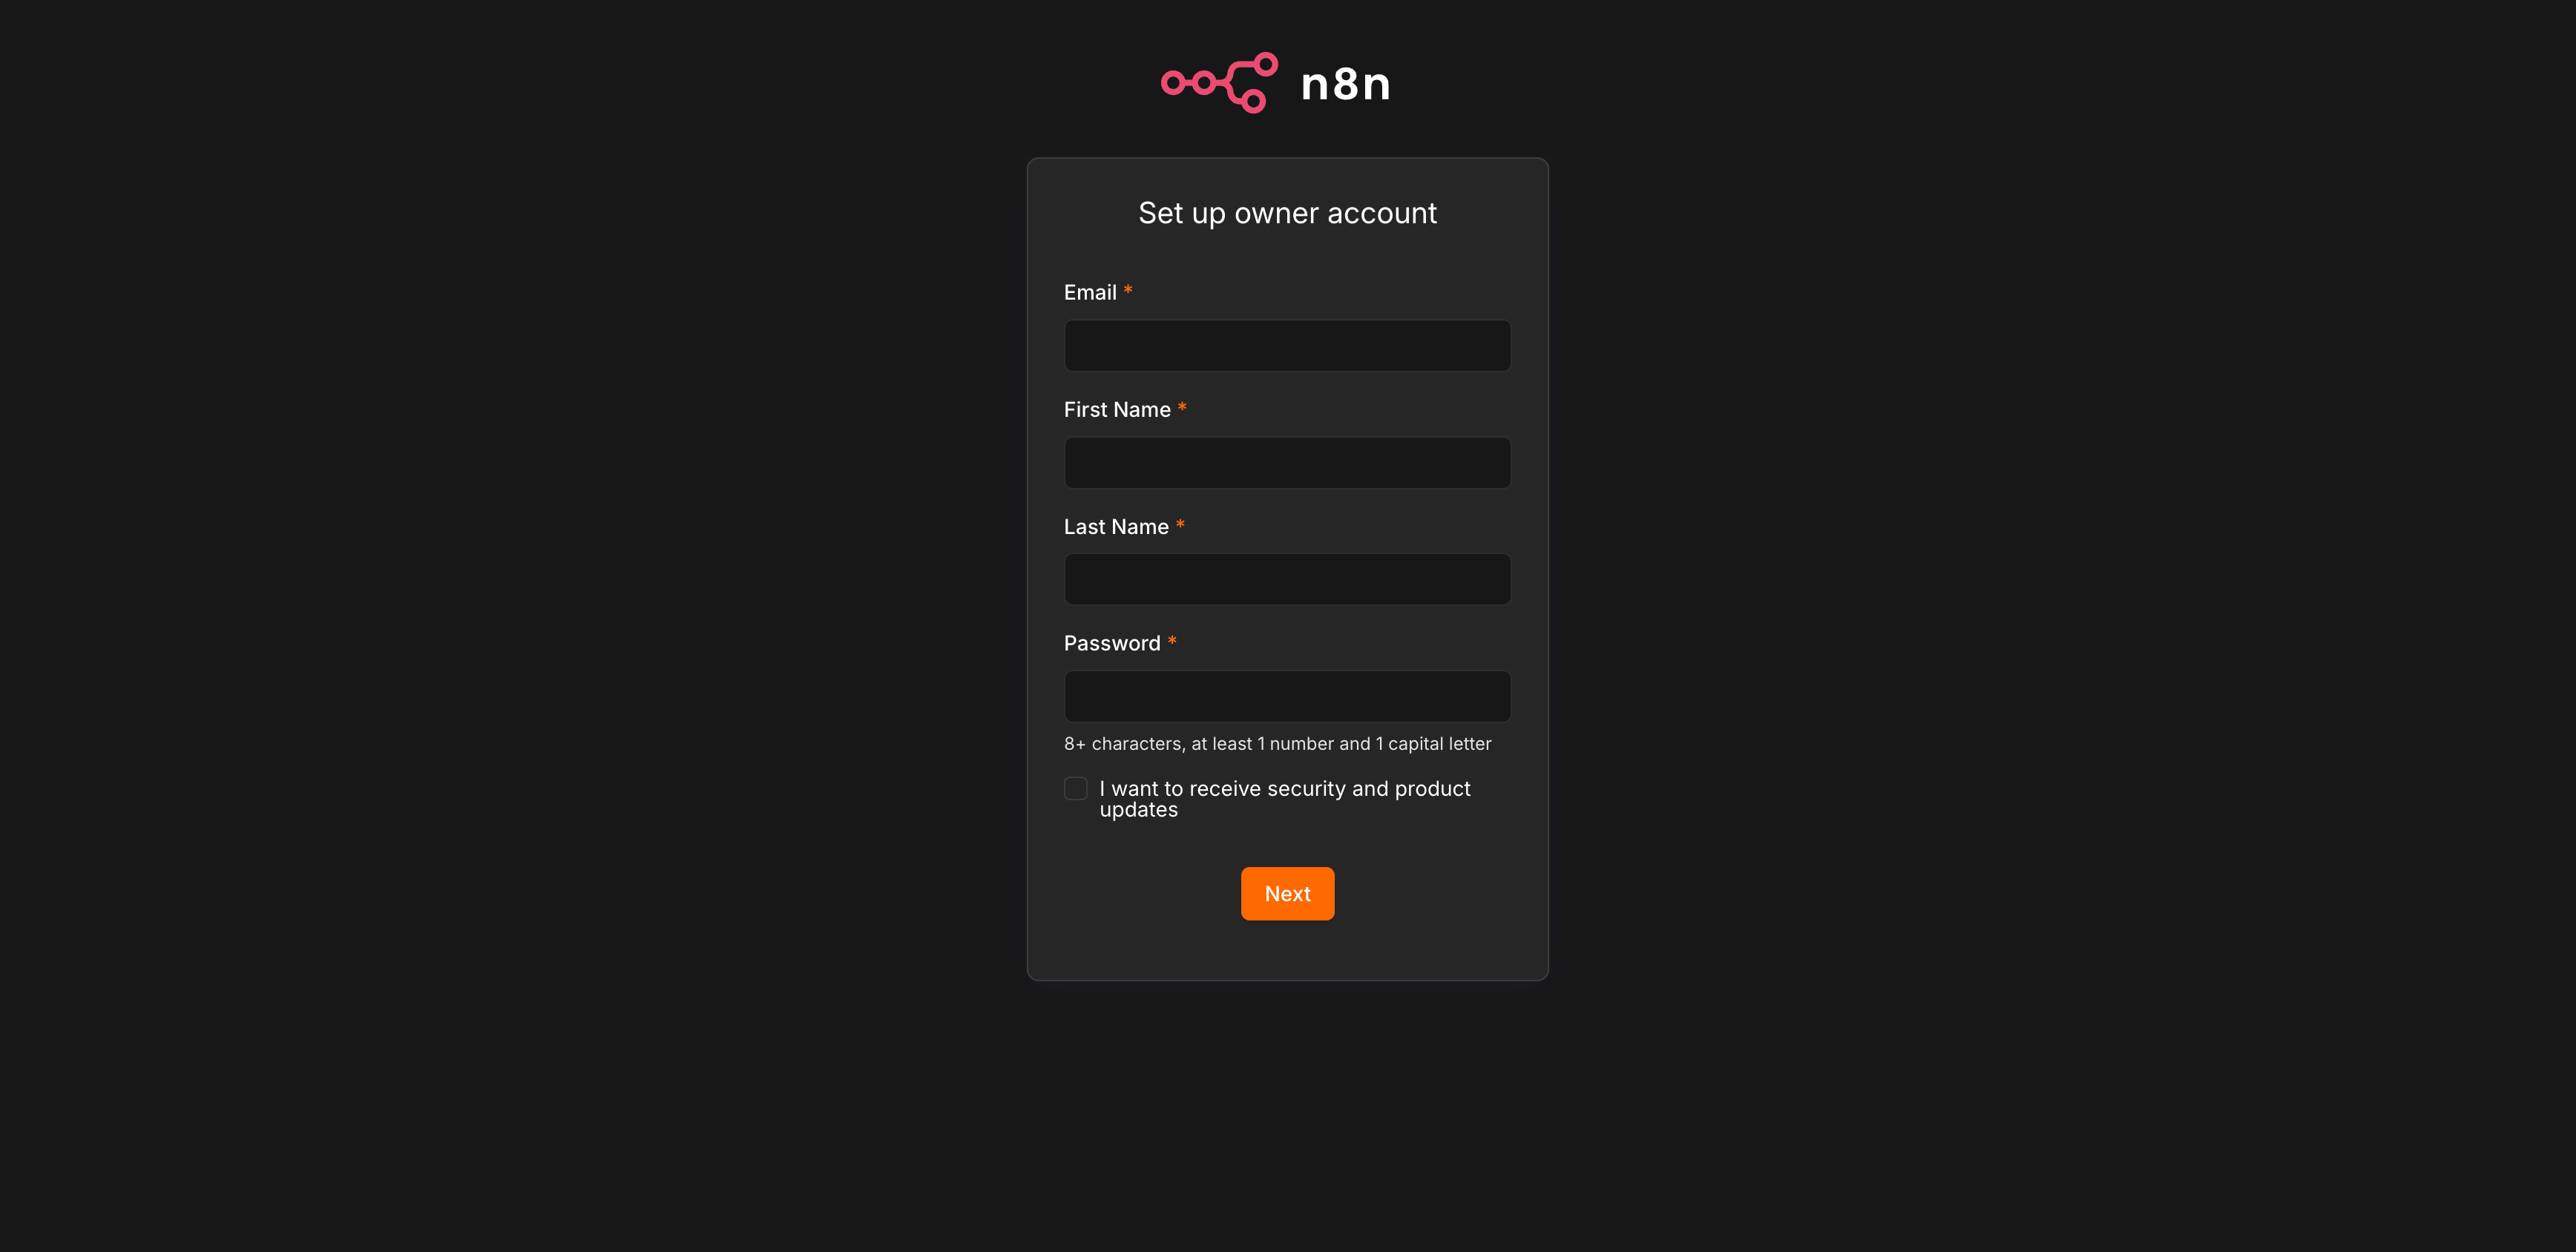
Deploy using an Agent
To deploy with a coding agent such as Claude Code, Codex, or OpenCode, follow these steps:1
Connect the Suga MCP
If you haven’t already, connect your agent to the Suga MCP server.
2
Ask your agent to deploy
From the directory containing your compose file, ask your agent to deploy your application to Suga.Here’s a basic prompt you can use:The agent will give you a link to the new environment on the Suga canvas. Open it to review the setup.
Prompt
3
Set the sensitive values
Env vars marked Sensitive need values before you can deploy. Select each container with sensitive variables, open its Env Vars tab, click each value input, and provide a value.The example file has two, which you can generate with
openssl rand -hex 32:POSTGRES_PASSWORDon the postgres container.N8N_ENCRYPTION_KEYon the n8n container. n8n uses this to encrypt credentials it stores in the database.
Save both values somewhere secure, you’ll want them later.
4
Apply to deploy
Click Apply in the top right. Suga rolls your containers out. For the example app, n8n’s first-run screen loads at the public URL a few seconds later.
What gets imported
Suga maps each field in your Compose file to its closest equivalent. Most fields import directly; a few aren’t needed on Suga, and a few need a small change.- Imported
- Handled for you
- Not imported
container
Each service becomes a container on the canvas. The service name becomes the container’s private hostname.
container image
Public registries work as-is; private registries need credentials set up once.
env vars
Values pass through, and
${VAR} placeholders are resolved: a variable shared between services imports as a cross-container reference, ${VAR:-default} defaults are applied, and names that look like secrets (passwords, keys, tokens) are marked Sensitive automatically.container command
Combined into the container’s start command, Docker-style: entrypoint first, command as its arguments.
private ports
Container ports become private ports; host ports are skipped. Add an HTTPS endpoint to the service that needs a public URL.
managed volume
Mounted at the same path. Persists across restarts, redeploys, and rollbacks.
resources & replicas
CPU and memory limits and reservations carry over to the container’s resource settings, and
replicas sets the instance count (services with volumes stay at 1).FAQ
What if my Compose file uses a Dockerfile instead of a published image?
What if my Compose file uses a Dockerfile instead of a published image?
Services with a
build: directive and no image are skipped on import. Add
a container for that service manually, then connect a build repository under
Image → Build from GitHub. Point it at the same source; Suga uses the
Dockerfile you specify or auto-detects the project. Every push to the watched
branch rebuilds and rolls the service forward.Do I need to keep the docker-compose.yml around after deploying?
Do I need to keep the docker-compose.yml around after deploying?
No. Once imported, the Suga environment is the source of truth. Keep the
Compose file in-repo for local dev if you want.
Can I still run docker compose up locally after deploying to Suga?
Can I still run docker compose up locally after deploying to Suga?
Yes. The Compose file works locally as before. Import reads it once; it
doesn’t stay linked to your Suga environment.
How do variables that reference other services work on Suga?
How do variables that reference other services work on Suga?
References use the syntax
{{<container-id>.variables.KEY}}, where the container id is the short resource id Suga assigns at creation. Set the value on one container and reference it from others. Suga’s own system variables (like SUGA_PUBLIC_HOSTNAME) work the same way.What if my Compose file has bind mounts I actually need?
What if my Compose file has bind mounts I actually need?
For seed data or config baked into the repo, copy the file into the container image with a small custom
Dockerfile layer or a build-repo commit. For persistent state, use a named volume in the Compose file instead of a bind mount, and Suga imports it as a managed volume.